Are you thinking about making a custom ESC for your RC Projects? It sure sounds exciting at first. But it may become frustrating once you start building it.
So, how do you build a DIY Brushed ESC on your own?
Well, before anything, you’ll need a microcontroller and a PCB board. Insert the microcontroller and a FET transistor into the PCB board. Now, there are a couple of steps to follow. And they are – inserting resistors, building a BEC circuit, and lastly, connecting some essential components.
Now, this is just a summary of the process. However, we have discussed all of these steps in-depth.
So, let’s not waste time and jump right in-
Contents
A Quick Look at ESC and What You Need to Know
Before we start, let’s get a short preview of ESC in general. And how it works.
Also, don’t worry! We will keep it short and informative for you.
Do You Really Want to Make the ESC Yourself?
Before we start, we should clear some confusion about custom ESCs.
First of all, they are only useful in custom RC projects. Not buying ESC every time will save you a lot of money.
They might never be the same as industrial grade, it’s very exciting to build them. You have to waterproof the ESC as well.
Also, as long as you know the basics, you can always customize your ESC by yourself.
How Does the ESC Work?
Now, in the RC field, ESC stands for Electronic Speed Controller. It lets you control your motor’s spinning speed. There are two types of ESC; brushed and brushless.
So, how does it work? Is there any crazy science behind it? Actually, it’s pretty simple.
Both types of ESC require an input signal to work. The signal comes from the receiver. It is called PPM or Pulse Position Modulation.
This input signal then gets transformed into a current which is drawn from the battery. This current powers the motor and it starts spinning.
An ESC can also supply enough energy for the steering servo and power it efficiently.
Also, brushed ESCs only support brushed motors. That’s why you can’t combine a brushed motor with a brushless ESC.
And that’s all you need to know about ESC. With all of these explained, we can now head right in.
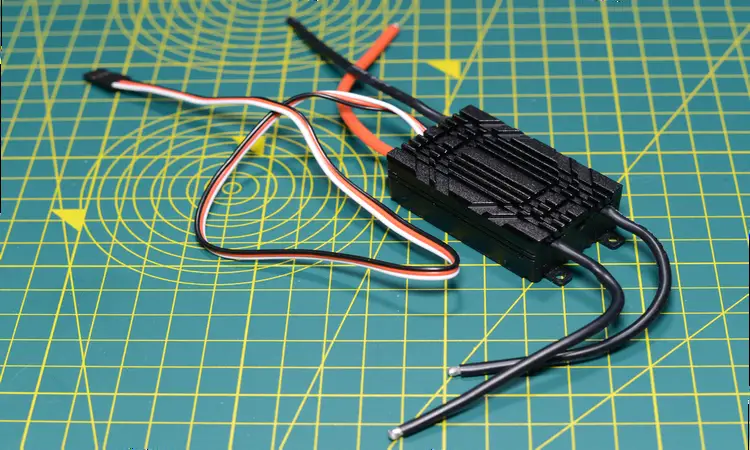
How to Make a DIY Brushed ESC?
Before we start, we need to gather some tools. We need a lot of tools for this but no need to panic! The process might be lengthy but it’s super easy.
So, keep calm and follow our instructions. Focus on one step at a time. We wish you the best of luck!
Necessary Materials for a Brushed ESC
To save you time, we have listed all the necessary materials you’re going to need. Let’s have a look at them below-
- PCB Board
- Microcontroller board
- FET Transistor
- 10K Pull-down Resistor
- 1K Resistor
- Soldering Iron
- Spool of Solder
- 1A – 5A Diode
- Servo Extension Cable
- 2 Pin JST Male Cable
- 2 Pin JST Female Cable
- Multimeter
- FTDI Programmer (if your microcontroller doesn’t have a USB port )
- A brushed motor
And for the BEC circuit, these are the items that you need –
- 5V Regulator
- 330nF Capacitor
- 100nF Capacitor
These are everything that you’ll need. So, get these tools and we can start building.
Step-1: Installing Microcontroller, Transistor, and Resistors
Firstly, you will need a PCB board and a microcontroller. You can use any microcontroller of your choice.
However, some microcontrollers have more input pins and they provide useful benefits. That’s why we wanted to suggest our top picks regarding microcontrollers-
| Image | Title | Price |
|---|---|---|
 | Seeeduino XIAO The Smallest Arduino Microcontroller | Check Price |
 | Arduino Nano 33 IoT | Check Price |
Now, gently insert the FET transistor beside the digital pin you chose. We recommend the D3 pin because it’s the most used digital pin.
The FET transistor has 3 terminals. They are called the Gate, Drain, and Source respectively. Remember this part because they are really important!
It’s time to get the soldering iron. Be extra careful when you start soldering. Because even a little bit of mistake can ruin or alter your circuit.
Solder the Gate pin with the D3 or any digital pin. Be sure to attach a 1K resistor in the middle.
For the next step, take the 10K Pull-down resistor and solder with the GND pin and D3 pin in a parallel connection.
Don’t let go of the soldering iron just yet. Because now you need to do some more soldering.
Step-2: Making a GND and VCC Line through Soldering
A lot of components require connection to the GND and VCC pins. But the pins are really small so there isn’t enough space to work with.
That’s why we are going to create two different lines. So that we can attach the transistors or resistors or any kind of components.
So, start soldering from the GND pin and fill up the subsequent holes. Merge them together. This will create a GND line. Connect the source pin to this line as well.
Now, do the same again and connect it with a VIN/VCC pin. This will be the VCC line. Also, please make sure that both lines aren’t touching each other.
When you’re done, let them dry up. Now, get the multimeter and check for a short circuit.
Step-3: Making a BEC Circuit
A BEC or a Battery Eliminator Circuit cuts down the need for multiple batteries. It simplifies the overall circuit.
To make a proper BEC circuit, we will need a regulator first. Take a 5V regulator and nicely insert it into your PCB board.
If you look carefully, you’ll notice that a regulator has 3 pins. They are called input, ground, and output.
Now, carefully solder the ground pin with the GND line that you just made a while ago. Also, don’t forget the output pin! Connect the output pin with the VCC line.
After regulators, we now need to install some capacitors. Take the 330nF capacitor and add it in a parallel connection with the GND and VCC line.
By the way, we still have a 100nF capacitor to connect. Let’s add it in a parallel connection with the GND and input pin of the regulator.
And with that, your BEC circuit is complete.
Step-4: Adding a Diode to Protect the Circuit
When you turn off the power, the motor coil produces reverse voltage. Adding a diode stops the reverse voltage from entering the circuit.
Therefore, you can call it the silent guardian of the circuit.
Attach the diode in a parallel connection. It will connect with the VCC line and the drain pin of the transistor.
Step-5: Finishing Up the ESC
First, you need the 3 pin connector. You can make it from a servo extension cable. They connect with the GND, +5V input of the regulator, and signal digital pin respectively.
Now, get the 2-pin JST female cable for the battery input. Connect the two headers to VCC and GND input.
After that, take the 2-pin male cable for motor input. Attach the two headers with the VCC input and the drain pin of the FET transistor.
Step-6: Uploading the Code and Testing the ESC
Now, all that remains is to get the code. You can easily find the necessary ESC code from google. Upload the code in your microcontroller via USB.
You will need an FTDI programmer if your microcontroller doesn’t have a built-in USB port. Attach it with the programming header.
Connect the connector, motor, and battery inputs correctly. And see for yourself! Also, you can use a current limiter to prevent any burning if you want to.
However, before using the ESC in your RC project, you might have some questions regarding waterproofing. Usually, brushed motors are waterproof and safer than brushless motors.
And that’s it. You have built a custom ESC on your own. Be sure to credit yourself properly because you have earned it.
How to Optimize Your ESC for Different Vehicles
Since ESCs are fundamental to your RC vehicles, you need to optimize them. To be really honest, optimization does not really follow any sort of rules.
For example, if you are making a drone, it requires 4 ESCs. So, make sure they are small. For a crawler, however, depending on its size, you can choose the appropriate size.
Also, make sure your ESC’s amp is 10-20% higher than the motor’s amp. Suppose, your motor has a 30 amp rating. In this case, your ESC should have an amp rating of 35-40.
Oh and remember one thing. If you don’t have a quality brushed motor, then it won’t matter how good your ESC is. Ultimately it won’t reflect good performance.
Lastly, your ESC will get dirty from time to time when used. So cleaning your ESC also extends its lifespan.
FAQs
Can brushless ESC run a brushed motor?
No, you cannot. It’s because brushless ESCs use a different mechanism. Brushed ESCs have three wires. Since brushed motors don’t have any wires, they aren’t compatible.
How does the brushed ESC control speed?
A brushed ESC controls how frequently it turns the voltage on or off. To increase speed, it will keep the voltage on more than the time it will keep the voltage off. The process simply gets reversed when you slow down the motor.
Can a bad ESC burn up the motor?
Yes. It goes both ways. A bad motor can damage the ESC and a bad ESC can burn up the motor. You can use a current limiter to prevent this easily.
Final Words
This is all we could provide on DIY brushed ESC. We hope this helped you, even a little bit.
So, were you able to build your custom brushed ESC?
Share your experience in the comment section! Lastly, good luck making your own brushed ESC!